Boost Efficiency in Segmentation Projects with Smart Labeling from LandingLens
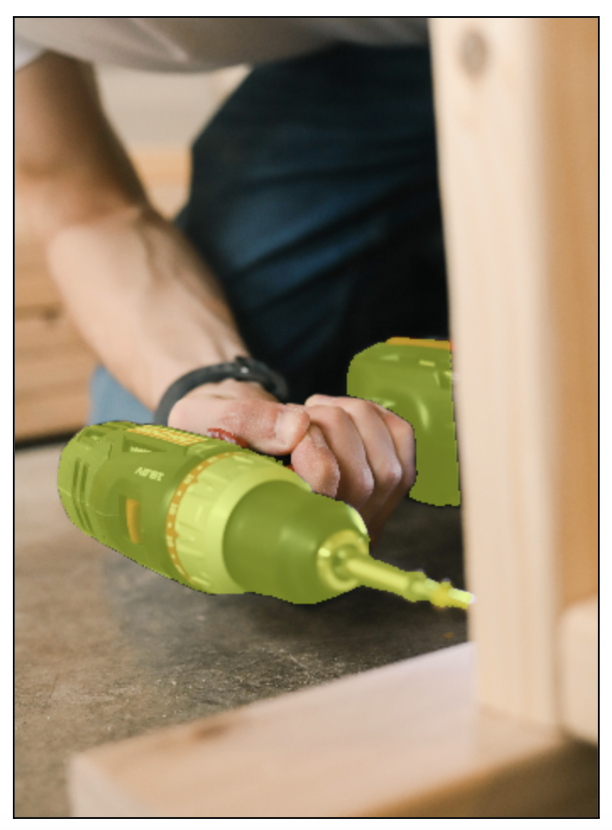
LandingAI is thrilled to unveil its latest innovation for AI image annotation in Segmentation Projects, a tool called Smart Labeling. As part of LandingLens, our computer vision cloud-based platform, Smart Labeling provides a cutting-edge solution for accurately and efficiently labeling objects within images for Segmentation Projects. Smart Labeling is powered by the Segment Anything Model (SAM), the open-source tool from Meta. By leveraging SAM, Smart Labeling provides automatic computer vision labeling, empowering users to label objects within images effortlessly with a single click.
With this AI image labeling tool, you simply click an object you want to detect, and Smart Labeling automatically selects the full object. It can detect even irregular shapes and objects with multiple colors and textures. Smart Labeling’s advanced algorithms automatically select the entire object, significantly expediting the annotation process.
Challenges with Traditional Labeling Tools
LandingLens already includes these labeling tools for Segmentation projects:
- Polygon: Create a shape to fill the object you want to detect.
- Brush: “Paint” over the object you want to detect.
- Polylines: Create lines over the object you want to detect.
These segmentation tools allow you to label objects that have irregular shapes, giving you more precise results than using a bounding box. Despite this advantage, these tools have tradeoffs.
First, even though these tools give you more precision than bounding boxes, they can’t perfectly match the outline of an object. For example, let’s see how these tools compare to Smart Labeling when labeling the same octopus image from earlier in this article:
Labeling Tools from Left to Right: Polygon, Brush, PolylineI
As you can see, while the Polygon tool was close, none of the tools were able to precisely label the entire octopus and only the octopus.
Second, manually drawing boundaries with these tools can be time-consuming. This is especially true if you have several objects in an image or a very large object with an irregular shape.
Key Benefits of Smart Labeling: Precision and Speed
To address the drawbacks of the existing labeling tools, LandingAI developed Smart Labeling. Smart Labeling offers unparalleled precision compared to manually annotating an image with a Polygon tool.
While drawing shapes manually using the Polygon tool often leads to imperfect outlines, Smart Labeling leverages its AI capabilities to detect all pixels within the object accurately. This ensures that no margin of “background” area is included within the label, resulting in more accurate and reliable annotations.
Furthermore, with Smart Labeling, gone are the days of meticulously outlining object boundaries using traditional Polygon or Brush tools. With Smart Labeling, annotators can save valuable time by merely clicking on the object of interest. This intuitive approach streamlines the process, allowing users to focus more on high-level tasks.
Deep Dive: Smart Labeling vs. the Polygon Tool
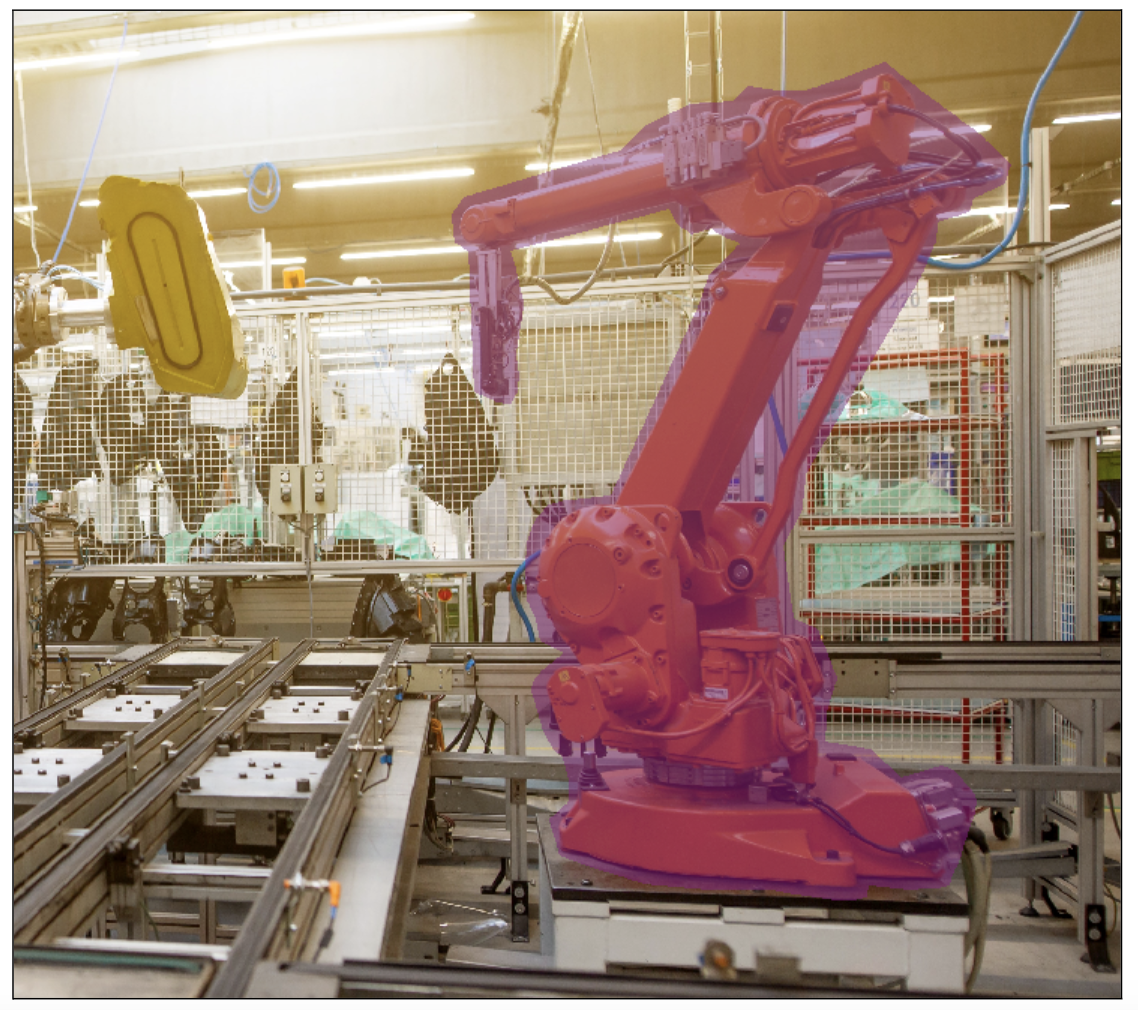
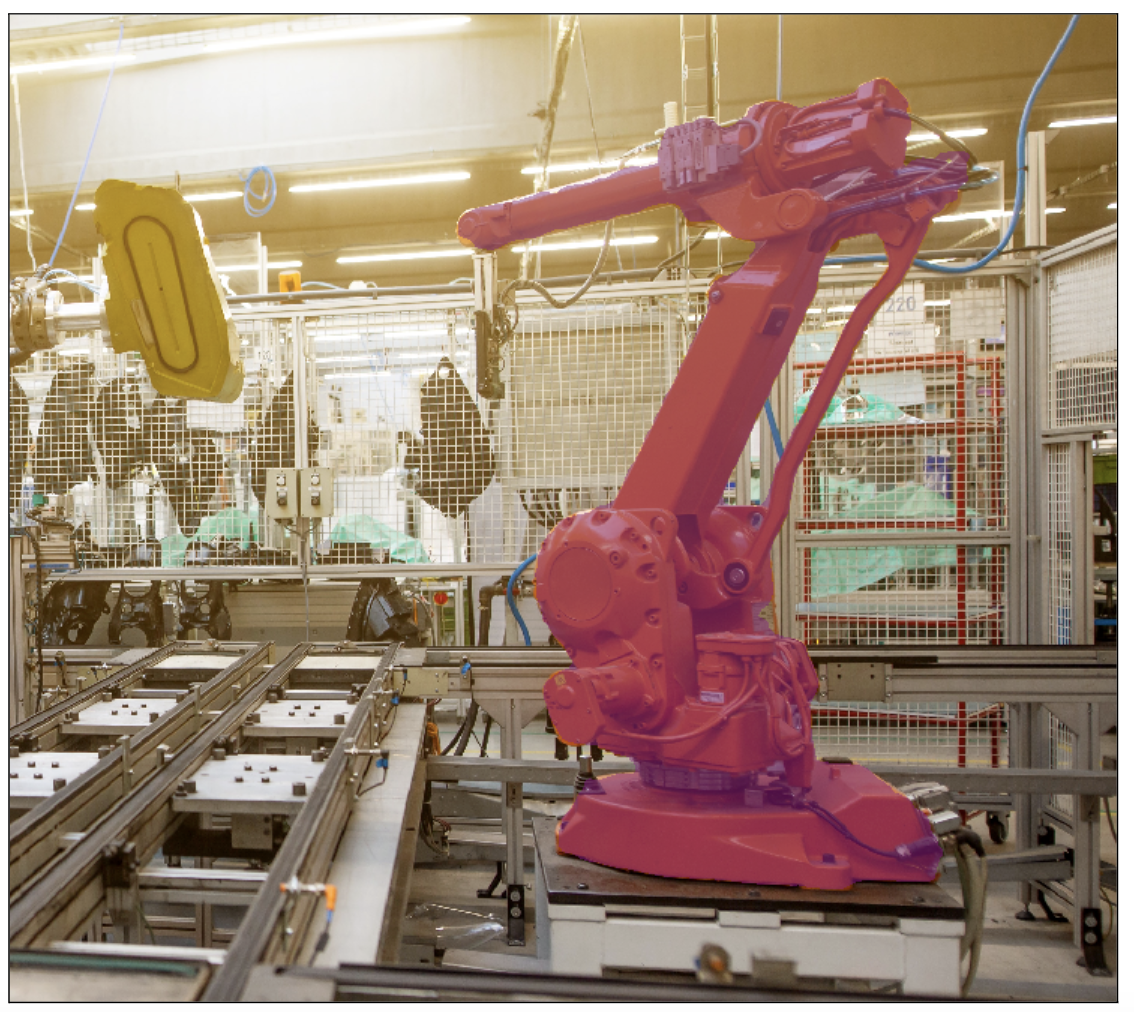
Look at the photos below to see how Smart Labeling and the Polygon tool compare when labeling an image of a robotic arm.
The first image was labeled with the Polygon tool. While the Polygon tool lets you create a custom shape, it’s difficult to outline the shape precisely, which leaves you with a margin of “background” around the shape. Additionally, the Polygon didn’t automatically remove the background space between the two parallel shafts at the center of the robotic arm.
The second image was labeled with Smart Labeling. In this image, the label is precisely on top of the robotic arm—there’s no margin around the arm! And, Smart Labeling was smart enough to remove the negative space between the two shafts of the arm!
Additionally, Smart Labeling took 1 second, whereas the Polygon tool took 90 seconds!
Label a Robotic Arm with the Polygon Tool
Label a Robotic Arm with Smart Labeling
Add or Remove Regions with a Click
In cases where the initial click might not select the entire object, Smart Labeling provides a flexible solution. Users can easily add or remove regions from the selected object.
When in Smart Labeling mode and hovering over an unselected area, the cursor transforms into a plus sign (+), allowing you to add the region to the label with a simple click. For example, in the GIF below, clicking one of the floats only selects that flat. If you want to label the whole seaplane, hover over the second float until the cursor turns into a plus sign (+), and then click. Then do the same for the main seaplane body. Now, all parts of the seaplane are selected.
Label Multiple Objects
When using Smart Labeling, all the regions labeled within one session are considered to be one object.
Therefore, if you have multiple objects you want to select in one image, start a new Smart Labeling session for each object. For example, let’s say you have an image of a circuit board and you want to label the 3 inductors it has. If you select all inductors in one session, LandingLens will think that these are all one object. Therefore, label 1 inductor, end the Smart Labeling session (press Return or Enter), and then label the next inductor.
Conclusion
Smart Labeling from LandingAI transforms the image annotation process for Segmentation Projects, bringing efficiency, accuracy, and simplicity to the task of object labeling.
By harnessing the power of advanced computer vision algorithms, Smart Labeling empowers developers and data scientists to enhance their productivity, drive innovation, and unlock the full potential of computer vision applications.
You can start using LandingLens for free
