

Introduction
In this tutorial, you will learn how to build a simple “Open Door Detector” app with the computer vision platform, LandingLens. You will then learn how to deploy it to the cloud and use the landingai-python library to predict new images from your terminal. If you use Zoom—or any other video conferencing tool—this custom computer vision software model could be used to automatically detect if you left your door open in the background!
Requirements
- LandingLens (register for a free trial here)
- Python (install for free here)
- Access to your computer’s terminal
- Webcam
- A door that you can open and close
Build the Model
First, let’s start off by creating a new Object Detection Project in LandingLens and using the webcam to upload some pictures. 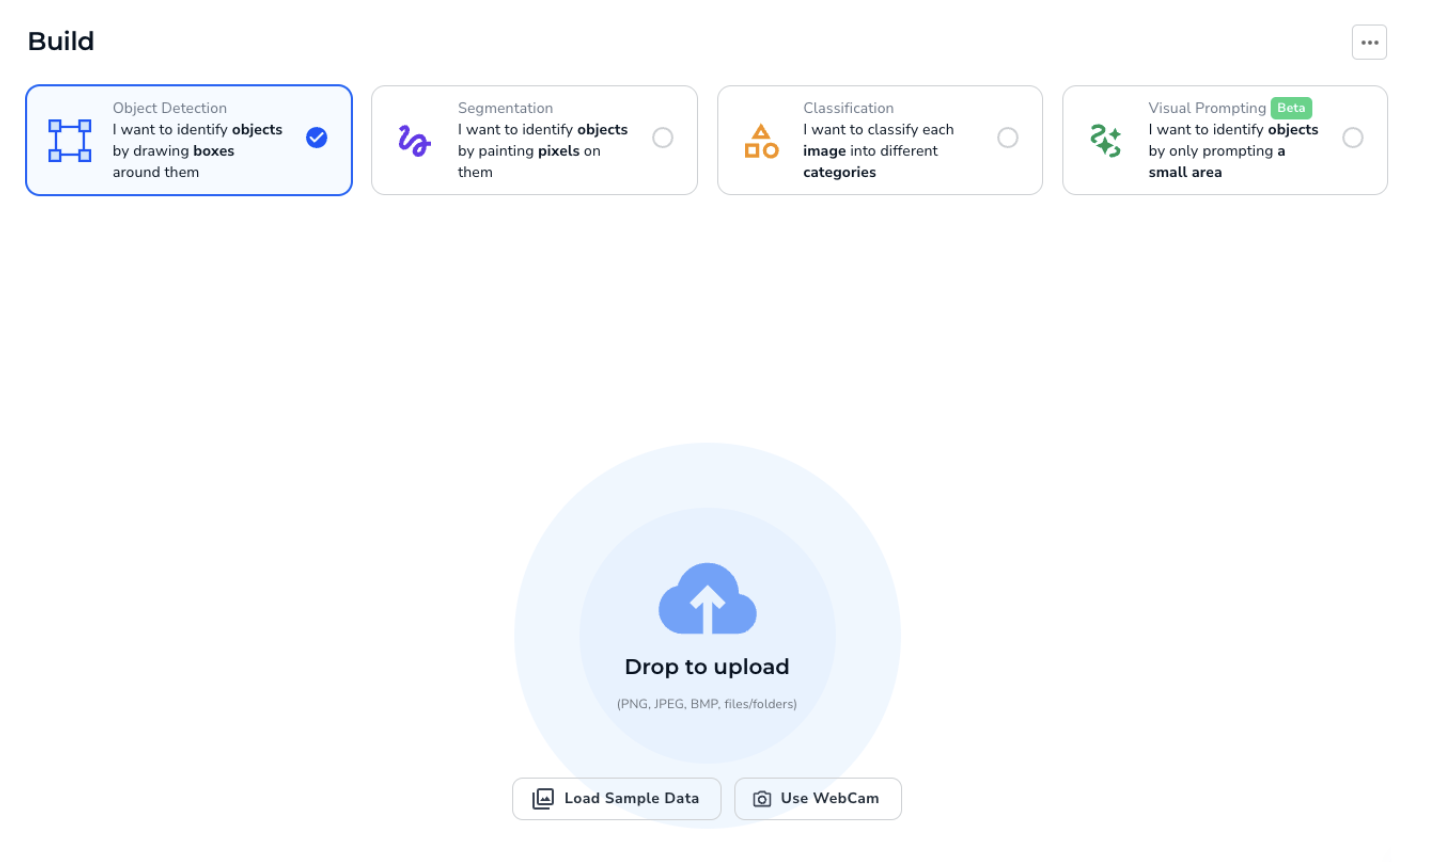 After you open the Upload pop-up window, you can click the blue circular icon to take a picture. Take a few photos with your door open, and a few with the door closed. LandingLens requires at least 10 labeled images to train a model, so make sure you get at least 10 photos.
 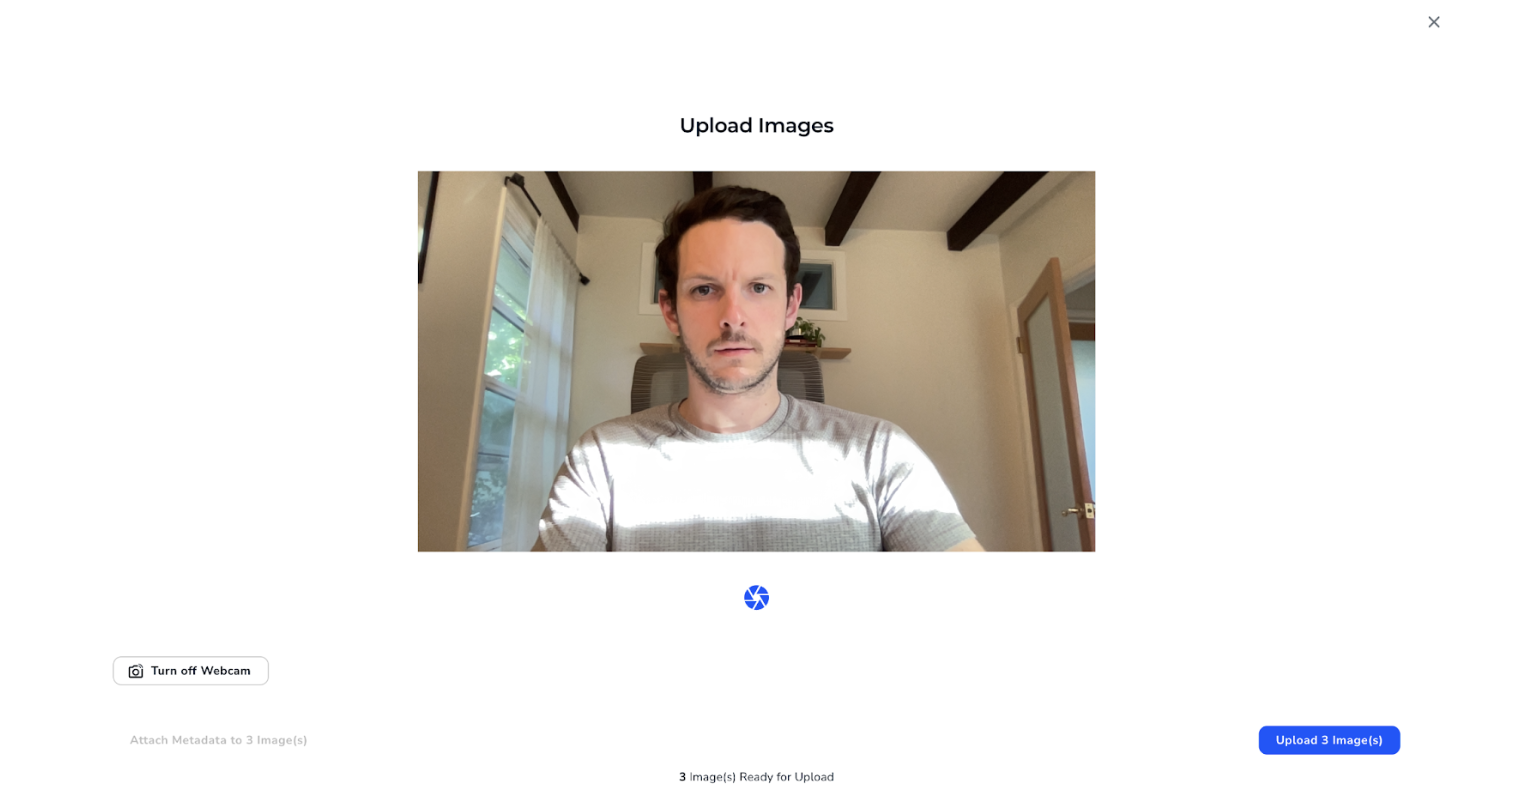 Then create a Class and name it “Open Door”.
 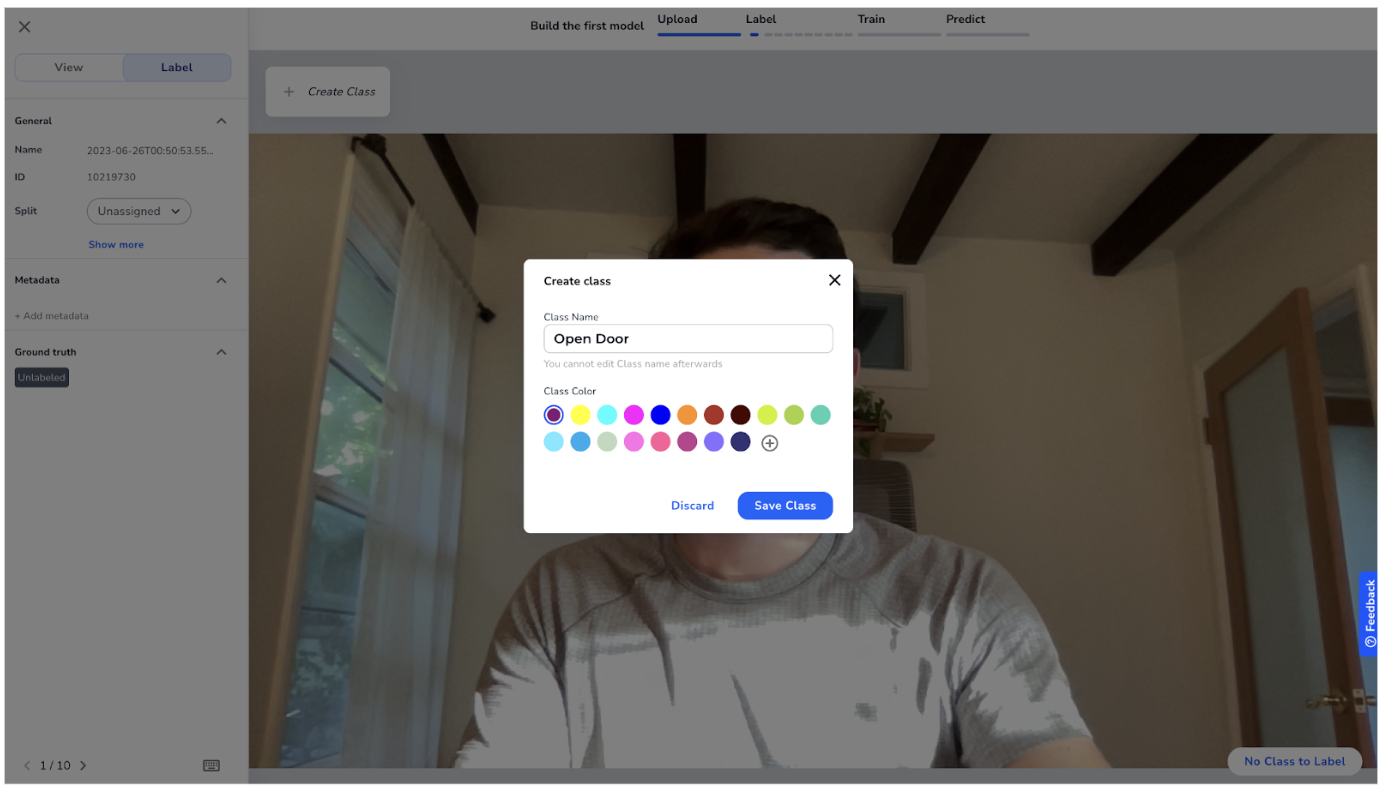 Use the labeling tool (bounding box) to label the door when it’s open.
  Once you’re done, click the Train button in the upper right corner.
 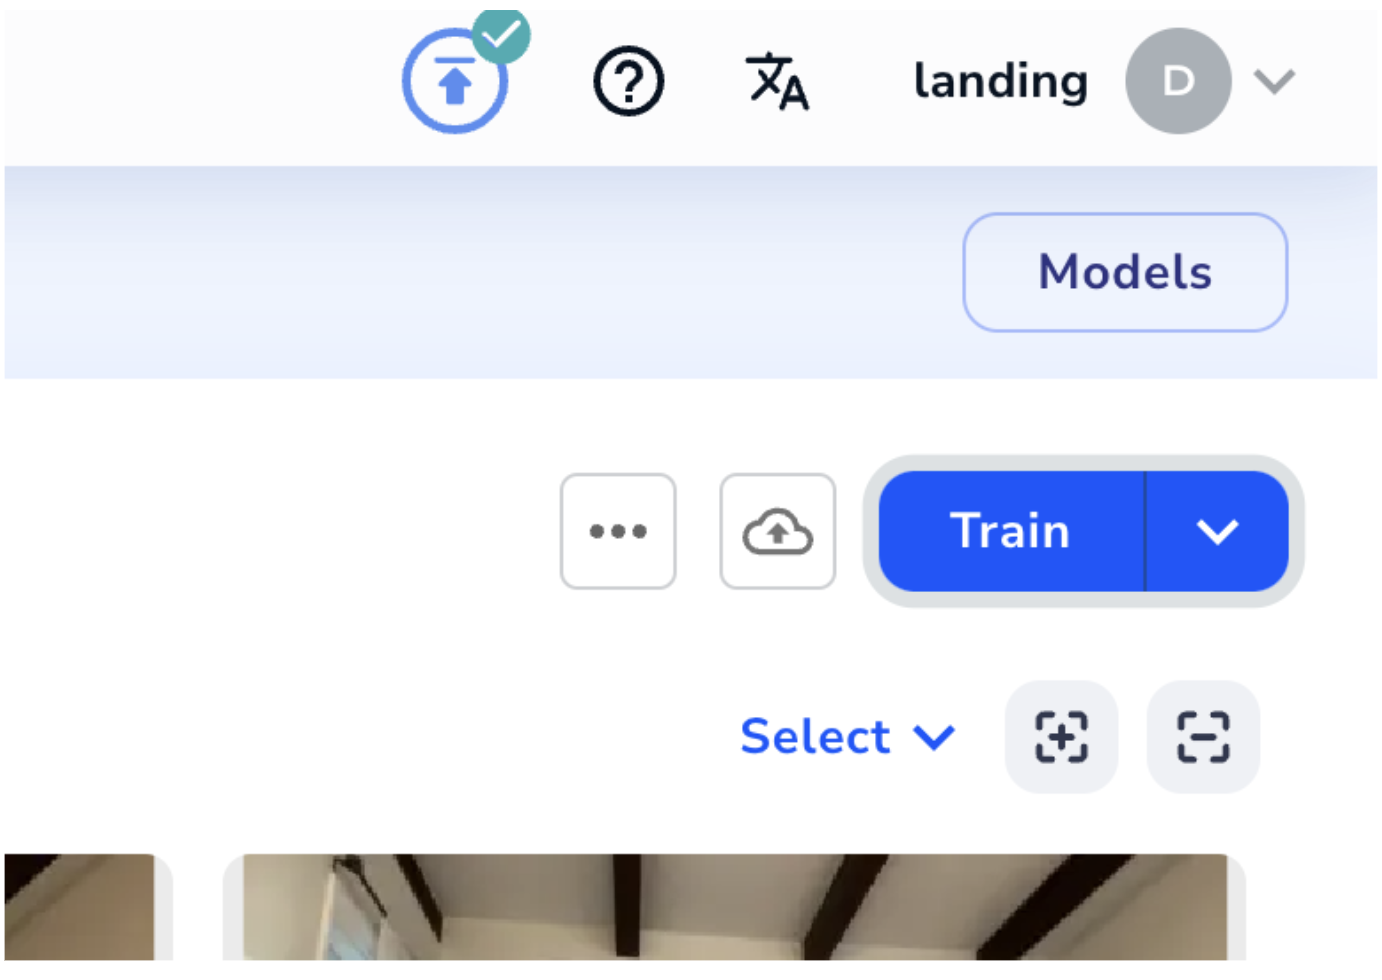 Once the model is done training, click the Save button in the Models panel. You can name it something like “My Model”.
 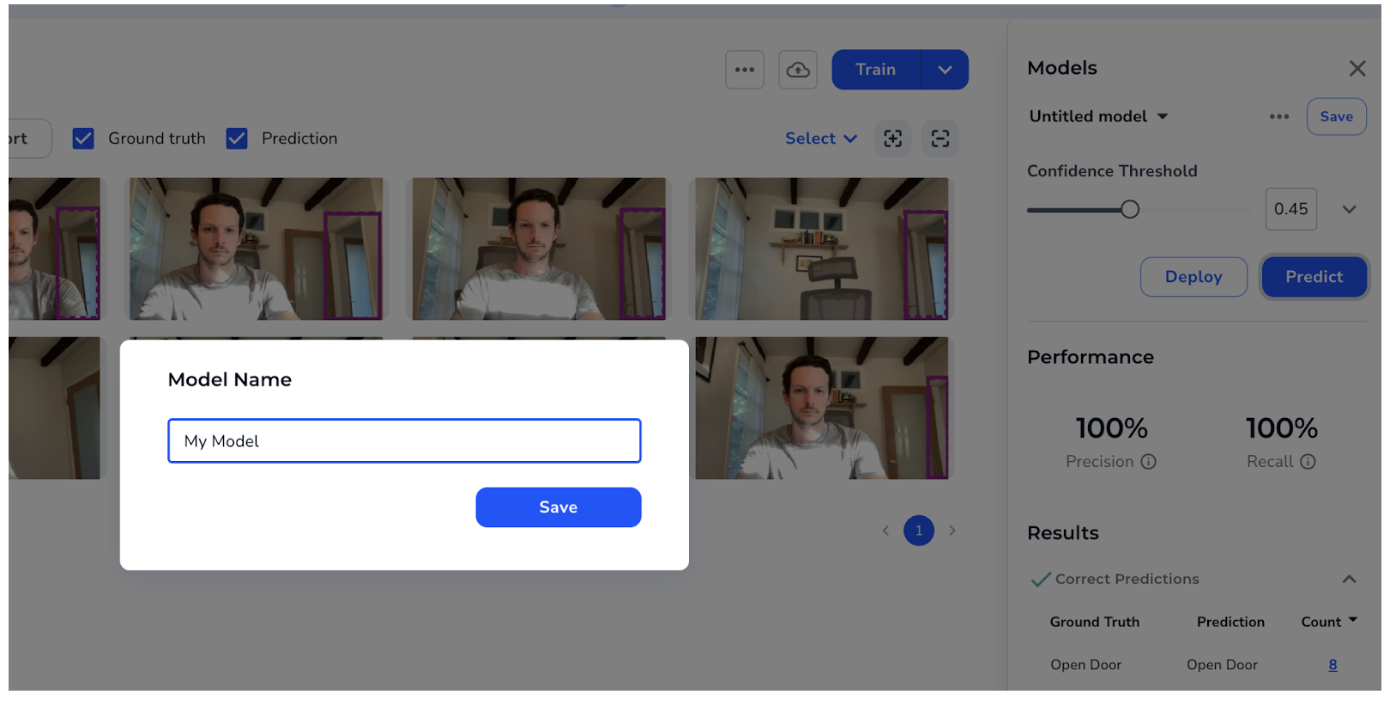 To deploy the model, click the Deploy button in the Models panel. A pop-up window opens, prompting you select either Cloud Deployment or Edge Deployment. Keep Cloud Deployment selected and click the plus sign at the bottom of the pop-up window to create an endpoint. An endpoint is the virtual location where the model will run inference.
 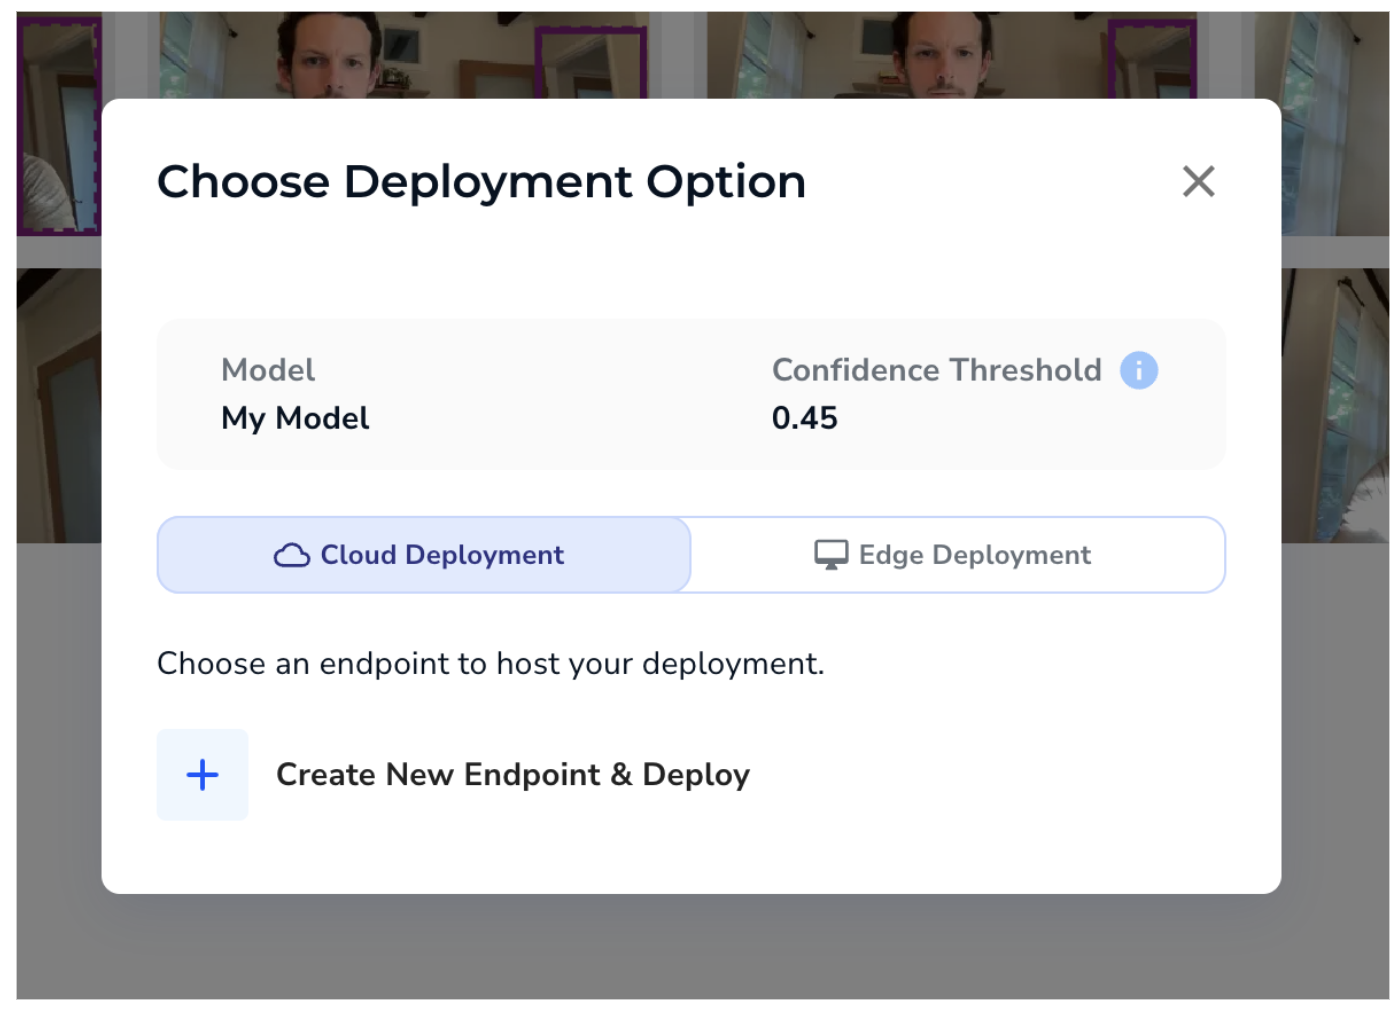 Now make sure My Model is selected and click Deploy to deploy the model to that endpoint.
 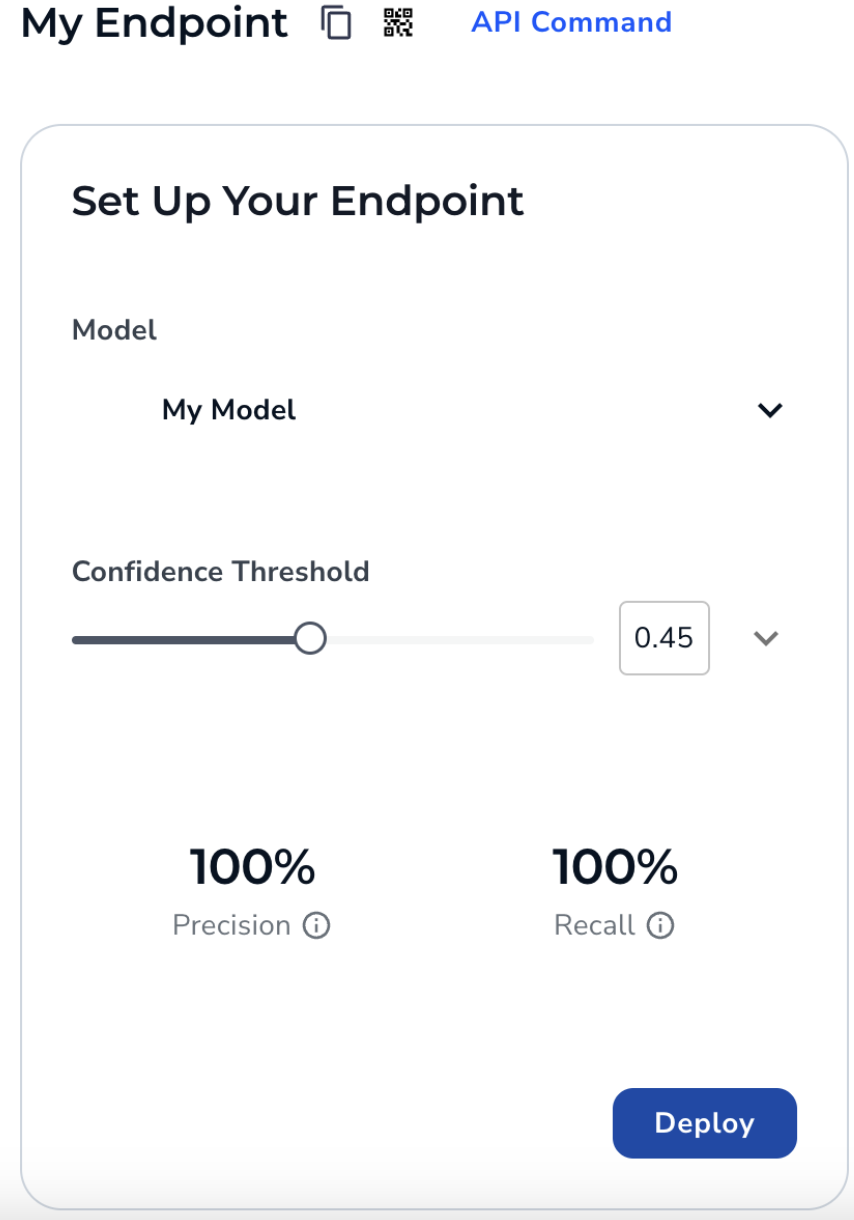 Congratulations! You’ve deployed your first model.
Call the Model From the Python Library
First you’ll want to generate an API key to run inference on the model. You can find this by clicking the User Menu in the top right corner and selecting API Key. 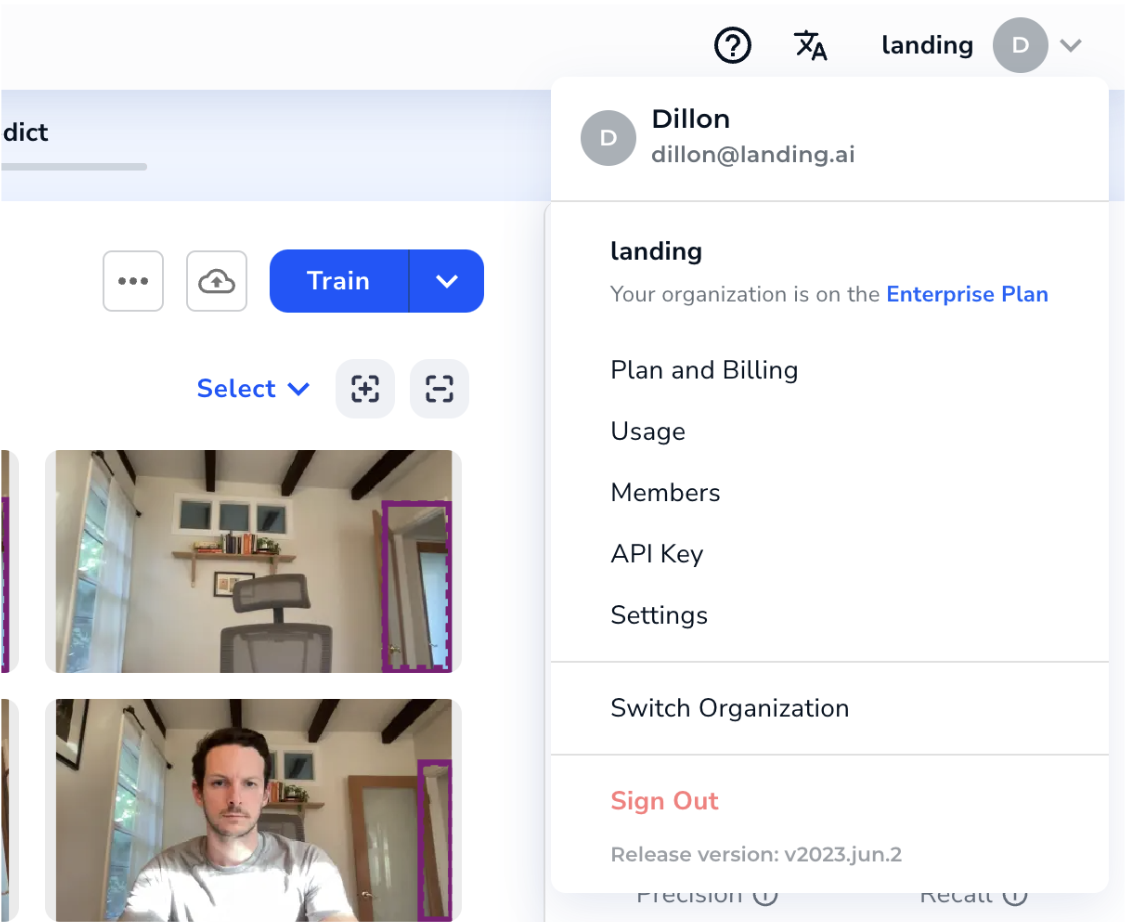 Then click Create New Key and save your API Key. If you’re having trouble check out the API Key tutorial. To ensure the software knows what endpoint to call, you will also need the endpoint ID. To find this, go to the “Deploy” page, then click the Copy Endpoint ID button next to the endpoint name. Be sure to save it somewhere.
 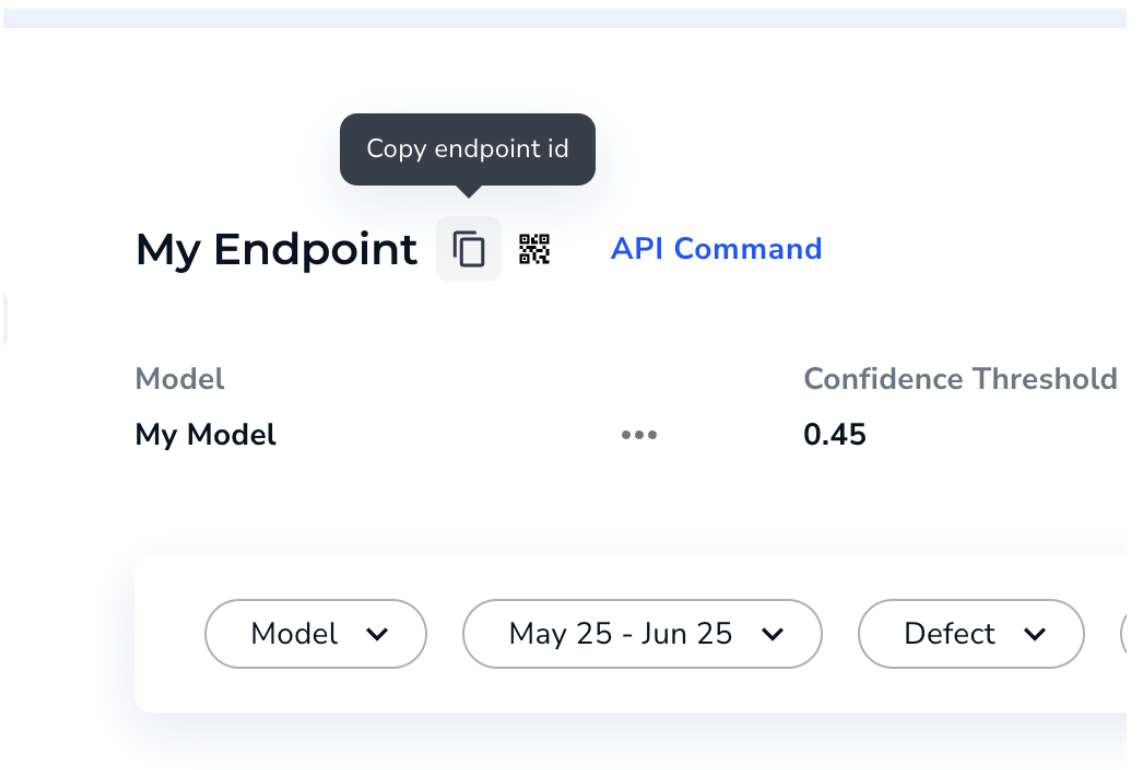 Next, we’ll install the Python Library. To install the landingai-python library run the following command in your terminal:
pip install landingai
Now, you’re ready to use the Python Library! The main class you’ll be using is the “Predictor” class, which allows you to send images to your endpoint. The model then makes predictions on those images. You can create a Predictor class by importing it from landingai, and passing it the endpoint ID and API Key.
from landingai.predict import Predictor

endpoint_id = "place your endpoint ID here"
api_key = "place your api key here"

door_model = Predictor(endpoint_id, api_key=api_key)
Now, take a photo with your webcam (or download one of the previous webcam photos from the LandingLens project) and save it as “my_image.png”. We can open up the image using the Python Image Library (PIL)Image class. Then convert the image to a NumPy array to pass to the predictor. We can also import “overlay_predictions” to see the predictions on the image.
from landingai.visualize import overlay_predictions

image = np.asarray(Image.open("my_image.png"))
preds = door_model.predict(image)
image_with_preds = overlay_predictions(preds, image)
image_with_preds.save("my_image_with_preds.png")
You can save the image with the predictions overlaid as “my_image_with_preds.png” and view it on your computer 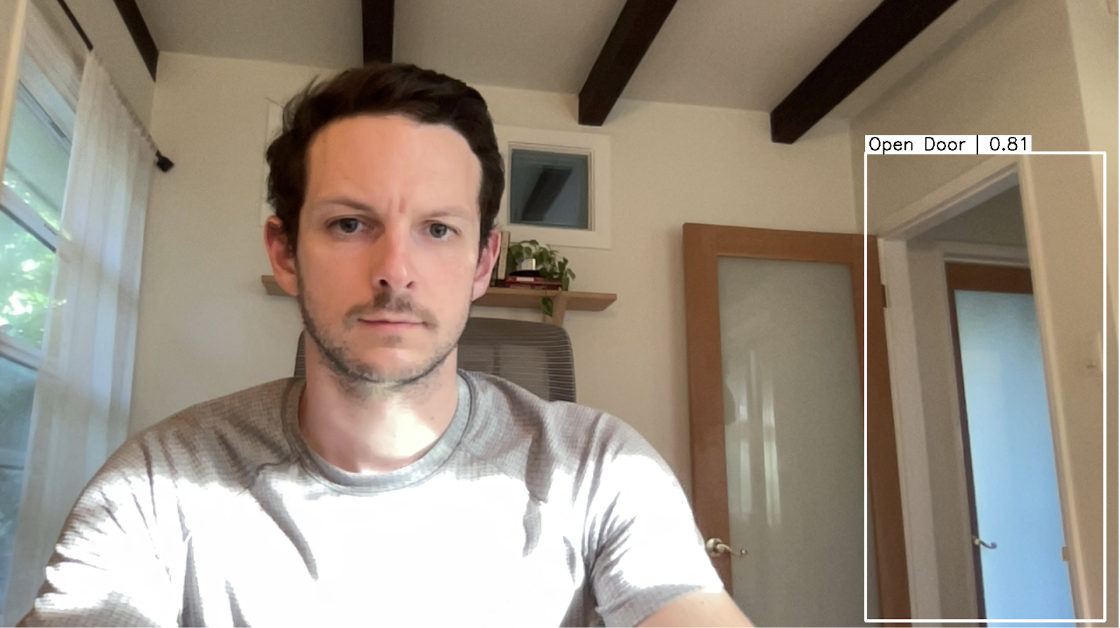 You can take this a step further and run this live on your webcam. To do this, import the “NetworkedCamera” object, which gives you an easier way to interface with the model and the images. You can loop over frames captured from the NetworkedCamera object and automatically run predictions on them with “run_predict”, overlay the predictions with “overlay_predictions”, and save them all in one line! This example is illustrated in the following snipper. To run the code, ensure that your terminal has permissions to access your webcam.
from landingai.predict import Predictor
from landingai.pipeline.image_source import NetworkedCamera

endpoint_id = "place your endpoint ID here"
api_key = "place your api key here"

door_model = Predictor(endpoint_id, api_key=api_key)
# 0 is the name of your webcam device
camera = NetworkedCamera(0)

for i, frame in enumerate(camera):
    # only run for 5 iterations so it doesn't run indefinitely
    if i > 5:
        break

    # the image_src="overlay" tells it to save the image from the
    # overlay operation, not the original image
    frame.run_predict(predictor=door_model).overlay_predictions().save_image(
        filename_prefix=f"webcam.{i}", image_src="overlay"
    )
And you can view the images! 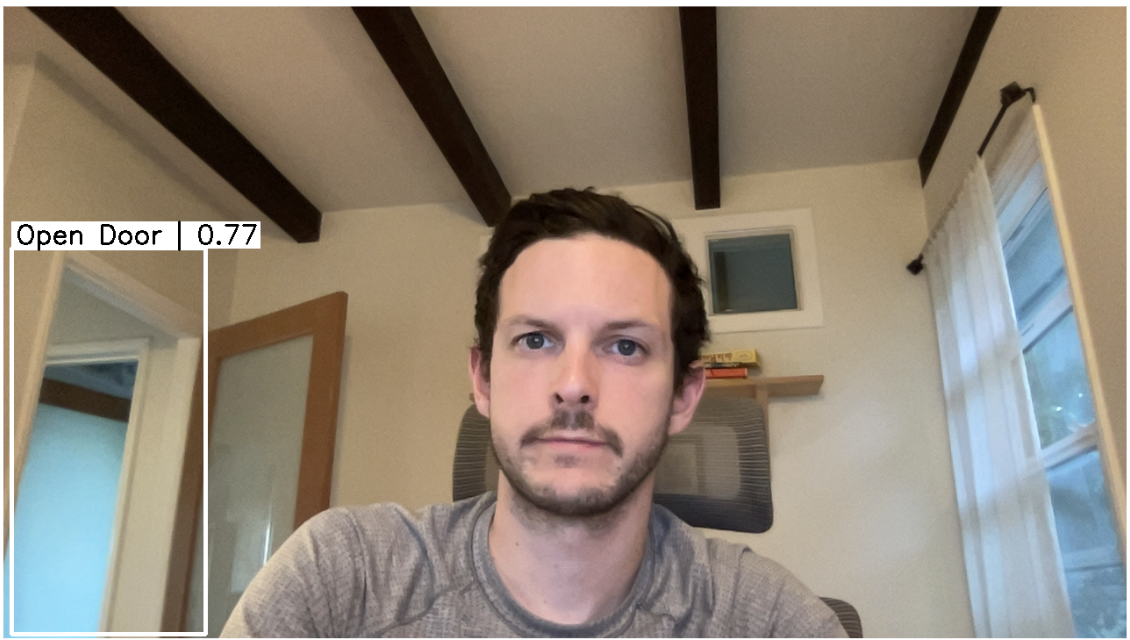 You could continue with the application and run this live while working and create a pop-up window if the door behind you suddenly opens.
Conclusion
In this tutorial, you learned to create a computer vision application using Python—from starting a new Object Detection project to training, deploying, and calling your model from the Python Library for integration into a real application. To learn more about the APIs, check out our GitHub page.