


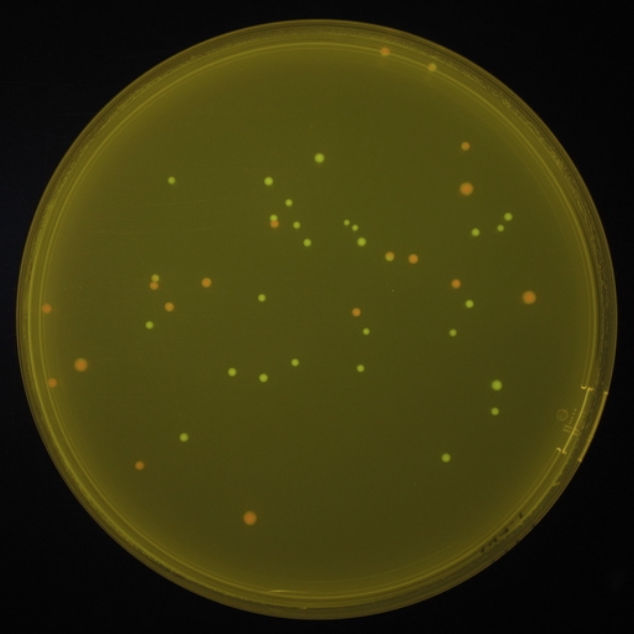
Counting colony-forming units (CFUs) is a common technique used in microbiology to estimate the number of viable microorganisms present in a sample. When viewed in a Petri dish, CFUs can look like small dots.
Challenges with Existing Methods for Counting Colony-Forming Units
Counting CFUs is an important step, but can come with several challenges:
- Time: Most CFU counting is done manually, which requires hours of time.
- Labor costs: Employing a team of researchers to spend hours counting cell colonies can lead to high labor costs, resulting in a significant expense. Also, each hour that a cell culture scientist spends counting cells is an hour that they can’t use to perform valuable research.
- Enumeration limit: CFU counting is a time-consuming process, and it may not be feasible to count colonies beyond a certain threshold due to the sheer number of colonies present in a sample.
- Observer bias: The process of counting CFUs involves human observation, which introduces the possibility of subjective judgment and inherent observer bias. Different individuals may interpret colony growth and count colonies differently, leading to variability in results.
- Expensive yet limited alternative solutions: Digital colony counters can save time, but these devices are often expensive. A company could develop a computer-vision-powered application that counts CFUs. However, each set of cell cultures can look very different, so it would be difficult to have a one-size-fits all solution.
Solve These Problems with LandingLens, the Computer Vision Cloud Solution
To overcome these challenges, you can create a computer vision Model in LandingLens, deploy it, and then run inference on a mobile browser.
Using LandingLens and LandingLens Cloud Inference on a mobile browser gives you these benefits:
- Save time: You can train an accurate computer vision model with only a few images and quickly get reliable results.
- Use your Model anywhere: Using LandingLens Cloud Inference on a mobile browser runs your Model like an app on your phone’s browser. Take a photo of your sample, and your Model runs inference on the image and shows you the results immediately on your phone!
- Continuous learning: All photos that you take on your phone are uploaded back to your project in LandingLens, so that you can see all the predictions in a centralized location. You can then choose to add those images to your dataset and further finetune your Model.
- Collaboration: Creates a QR code that you can share with your colleagues, so that you can all run inference for the same project.
See LandingLens Cloud Inference on a Mobile Browser in Action
But what does this actually look like? Let’s walk through an example of how you can create and deploy a cell colony counting app in just minutes with LandingLens.
Step 1: Create a Project in LandingLens
Create an Object Detection in LandingLens. Don’t have LandingLens? No worries, sign up for free here!
Upload a few photos of your Petri dishes that have cell colonies. For best results, use photos that match what you’ll be using in the real-world. Remember: good data in, good data out!

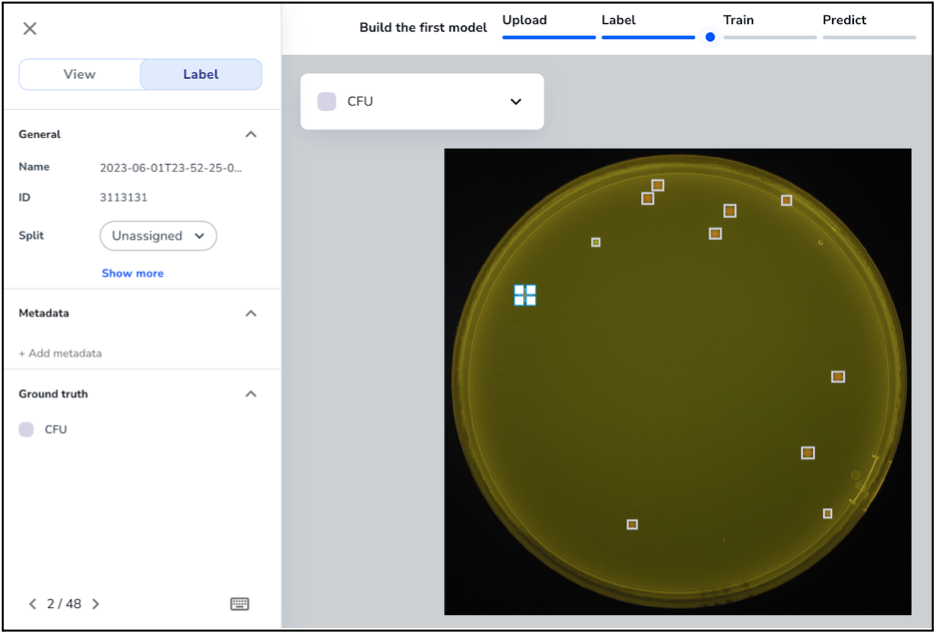
Step 2: Label Your Images
Create a Class for the cell colonies. When you label an image, the label assigns this Class to the labeled pixels.
Use the annotation tools in LandingLens to label the cell colonies. If you created an Object Detection Project, you’ll use a bounding box to draw a square around each colony.
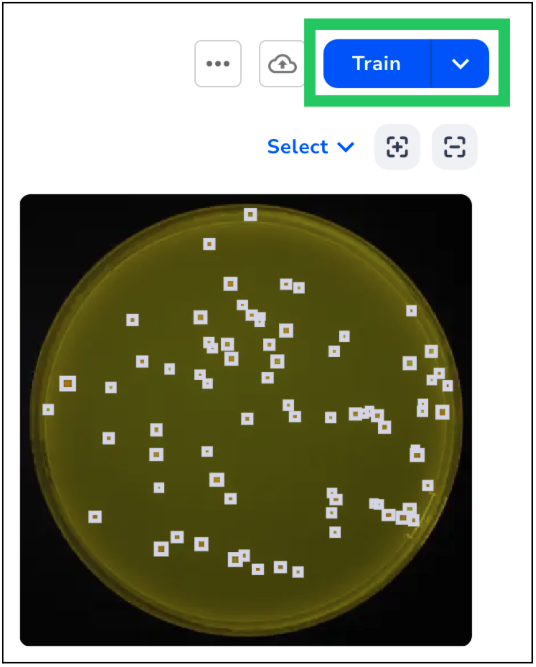
Step 3: Train Your Model
After you label all your images, click Train. During training, LandingLens takes the images and labels you provided and “teaches” your Model to detect the labeled regions.
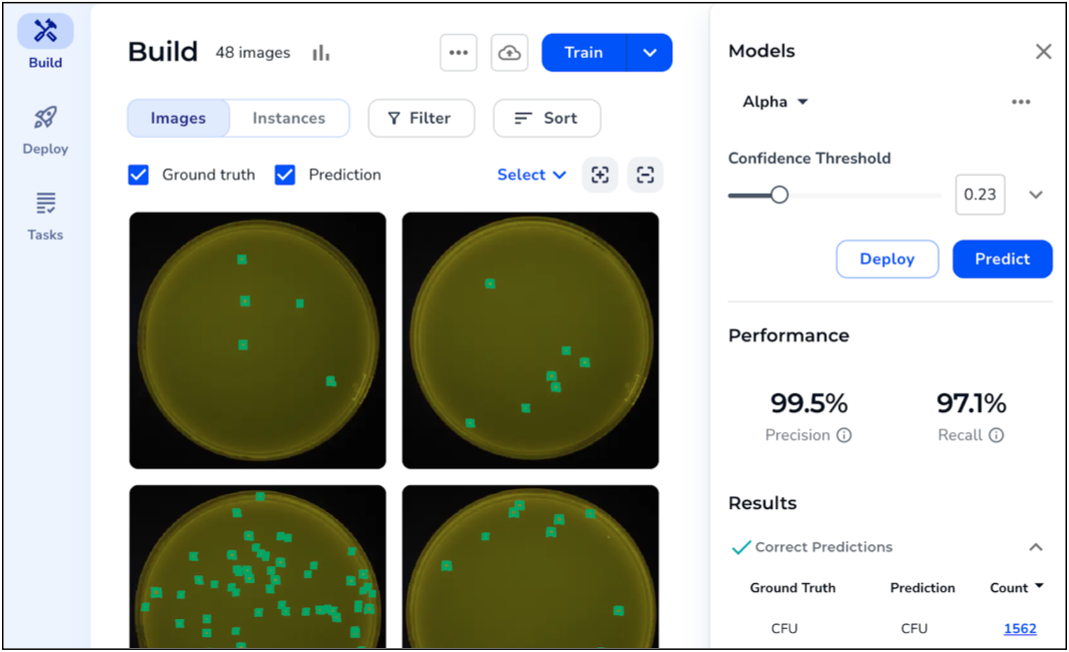
You can view the Model predictions and performance scores.
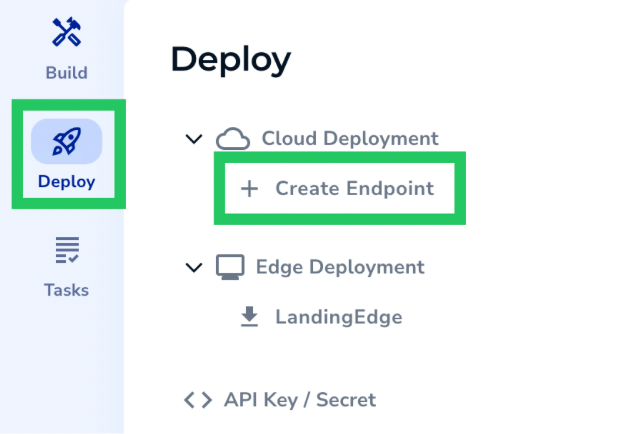
Step 4: Deploy Your Model
After you train your Model, you’re ready to deploy it. Deploying means you put the Model in a virtual location so that you can later send images to the Model for it to make predictions on.
To deploy a Model, click Deploy and Create Endpoint. Then follow the on-screen instructions to create your endpoint, which is the virtual device that will host the Model.
Step 5: Generate Your QR Code
If you’ve used LandingLens before, you may realize that up until now, this is exactly how you would develop and deploy any other Model in the platform. Now, let’s test your model on your phone.
After you deploy, click the QR icon next to your endpoint name.
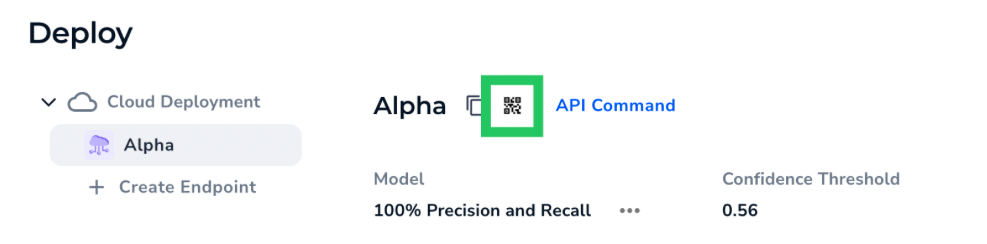
The QR code that is unique to this deployment pops up.

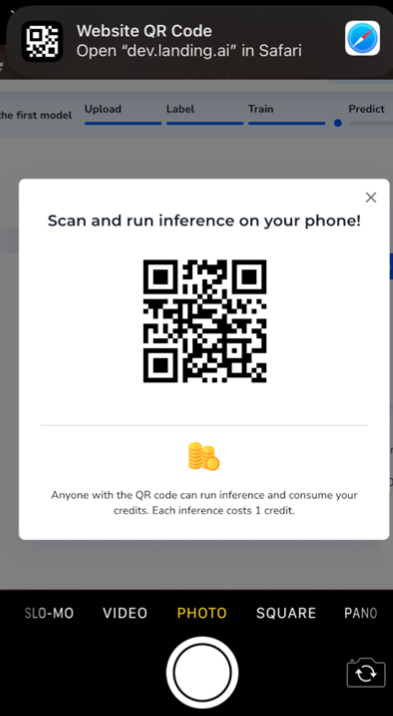
Step 6: Scan the QR Code
Turn on your phone’s camera app, and hold up your phone to the QR code. A pop-up displays at the top of your phone: click it. This opens the LandingLens app in your browser.
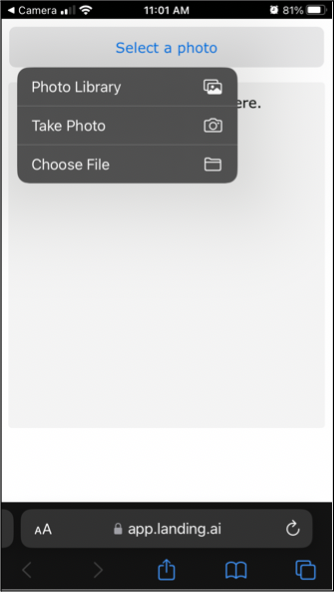
Step 7: Run Inference
Click Select a Photo, and select one of these options to get an image:
- Photo Library
- Take Photo
- Choose File
For example, if you’re in a lab with your Petri dishes, click Take Photo.
Take a photo of the Petri dish that has CFUs.
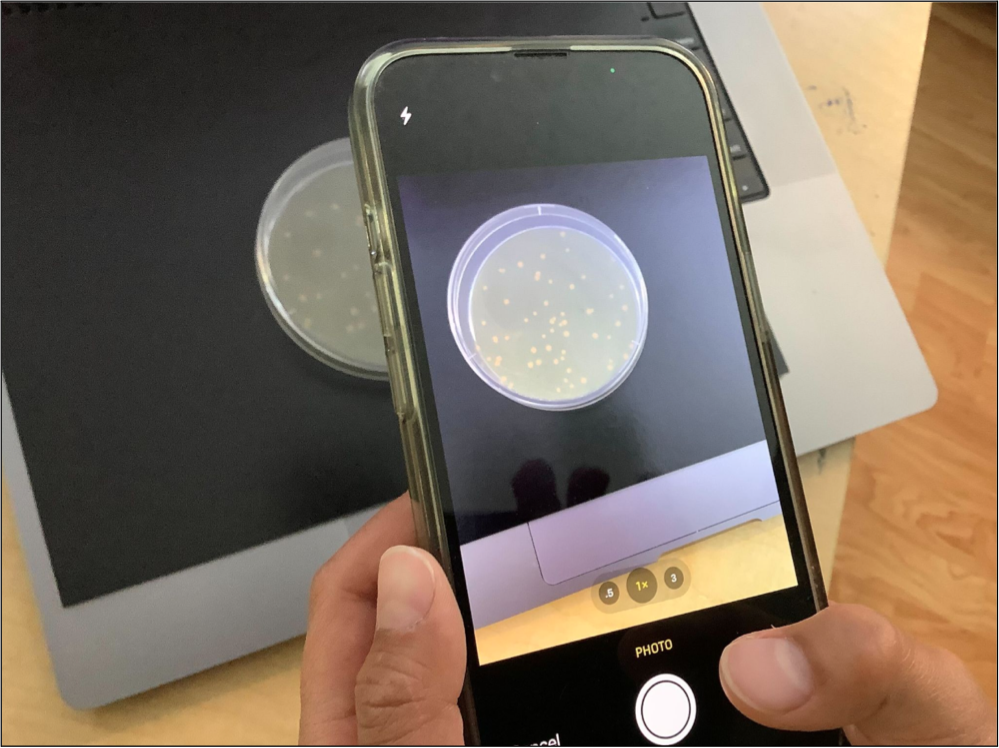
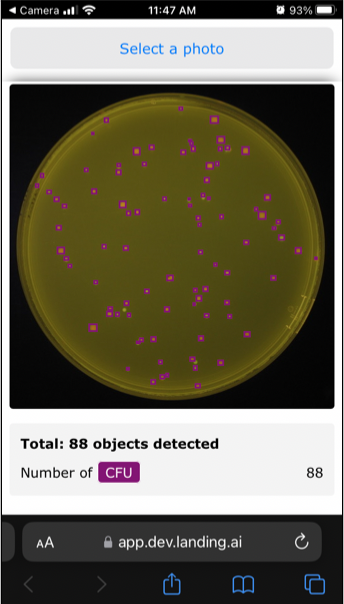
After you take the picture, the app sends the photo to your deployed Model, and your Model runs inference on it.
The Model’s predictions show up almost instantaneously as overlays on your phone! If you have more samples lined up, you can keep taking photos and running predictions–just click Select a Photo to continue.
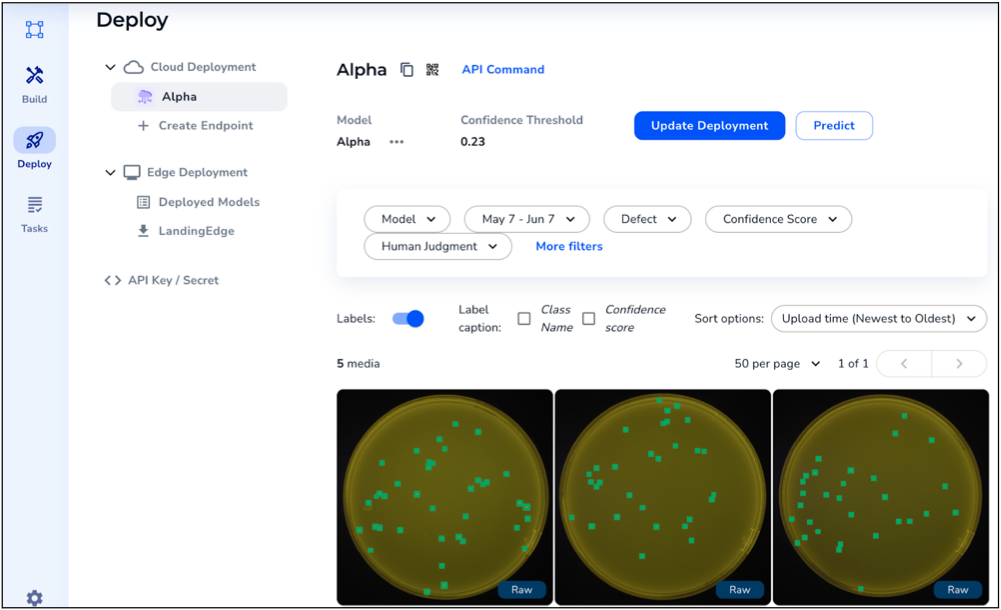
Step 8: View Results Back in LandingLens
All the photos you’ve taken and their predictions display on the Deploy page back in LandingLens.
Conclusion
LandingLens can save you significant time when counting CFUs. Instead of taking photos, uploading them to your computer, uploading them from your computer to LandingLens, and then running inference, you can just take a picture of each sample on your phone!
To get started, try out LandingLens for free here!
")